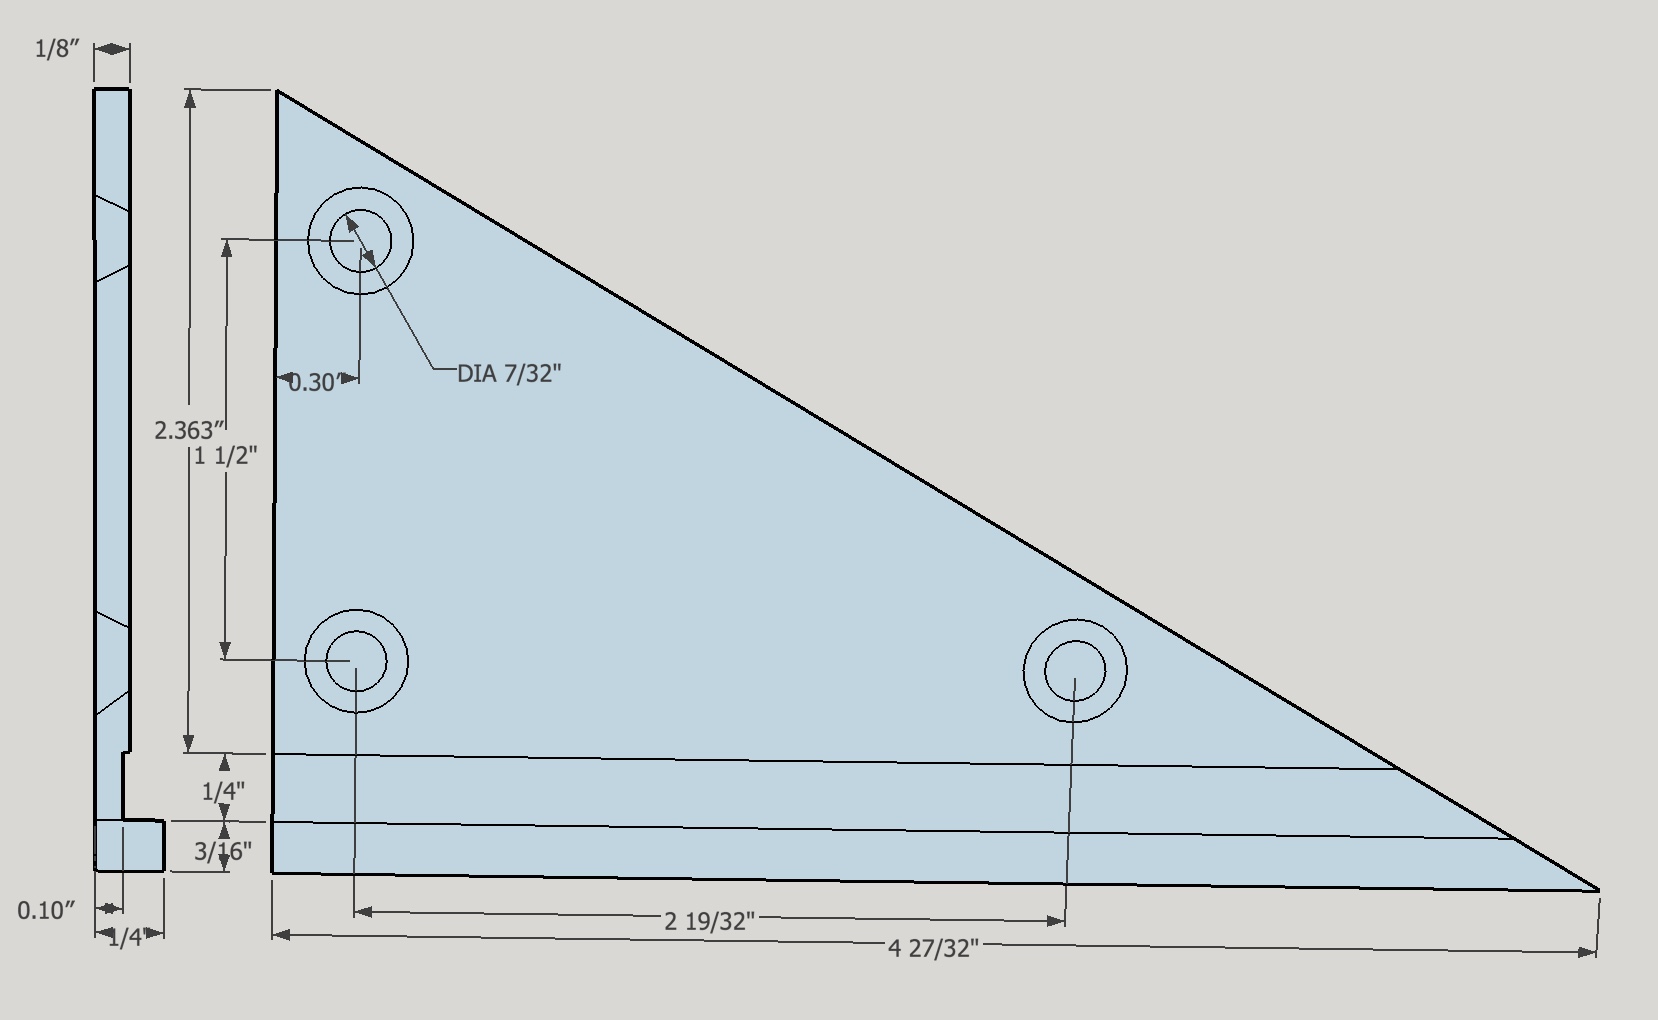
This project started with a 1/4" X 3" X 5" aluminum bar which was cut diagonally with a hack saw to rough dimensions: 2.907" X 5.043". The resulting triangle was clamped to the table with 2 strap clamps and the base edge parallel to the front of the table.
This project came from the "The Home Machinist's Handbook".

The edges were carefully located and the spindle was set at 0.842" X 0.362" from the bottom left corner (allowing 1/16" waste on both sides). The material was then center drilled, drilled with a 7/32" bit and countersunk to the bottom of the hole (0.25"). The table was moved 1.50" and the process was repeated for the second hole. Moving back 1.50" and to the right 2.60" the third hole was drilled and countersunk.
The material was then clamped on large parallels with the base edge again parallel to the table. This alignment was checked with the dial indicator ro make sure it was well aligned. First, 0.062" of waste was removed with a 1/4" end mill. The table was then moved 0.437" and a 1/4" slot was cut to a depth of 0.150". The short edge was then trimmed by 0.062" as well.
The entire piece except for the long side was thinned to 0.125" with the triple insert carbide cutter. Found that 0.010" at a slow speed gave a clean cut with little "digging in".
The work piece was reset so that the long edge was parallel with the back of the table (again using the dial indicator for precision). This edge was trimmed 0.040". The edges of the tool were deburred with a file. It was then sanded (100, 220, 320, 400 grit, and extra fine steel wool [000]) to give a polished face.
This has been my go to tool ever since for setting things parallel on the milling table. Using this to set the vise is accurate to about 0.001" per inch of travel!
Not mentioned above was that two attempts were made and only the second was successful. If I remember correctly, the first was not properly aligned with the milling table.